How to Add HTML custom option in Product Custom Options
-
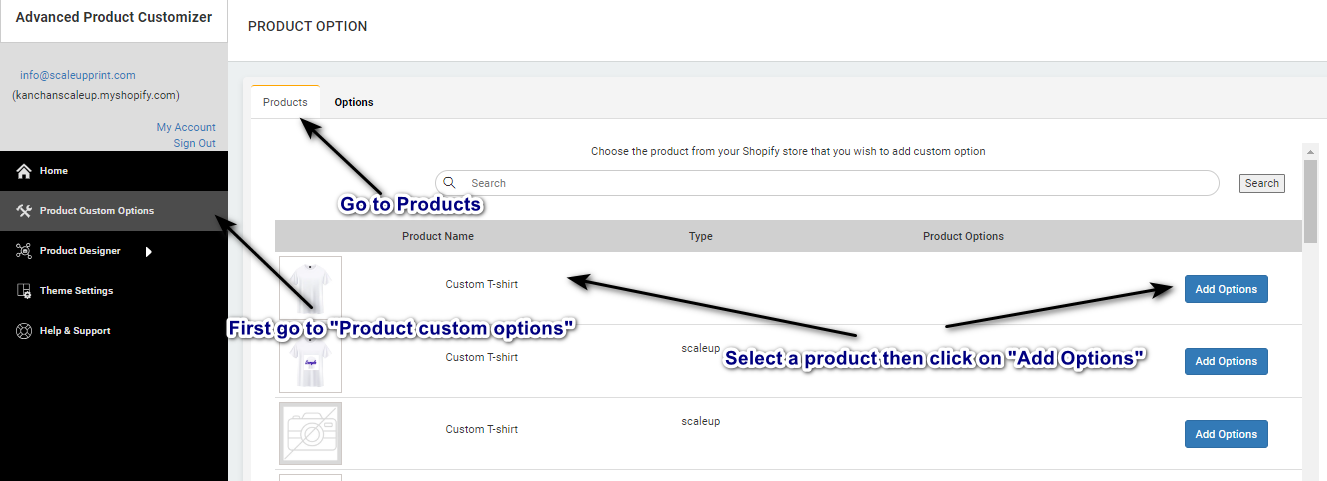
Access Product Custom Options
Firstly, navigate to the product custom options section and select the product where you intend to add the custom option. Click on "Add Options" to proceed.
-
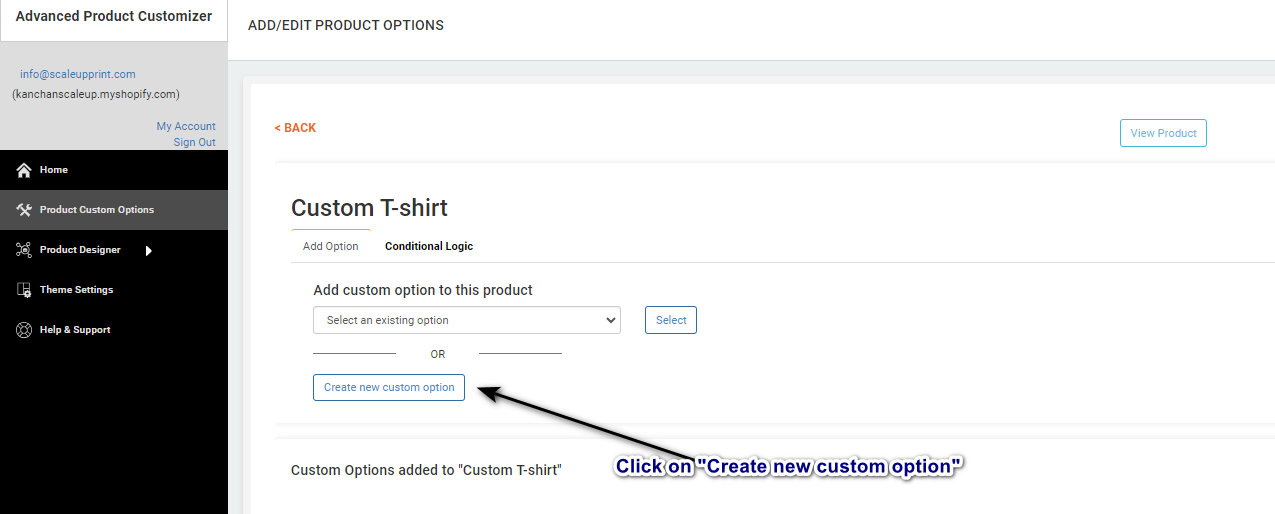
Create a New Custom Option
Next, upon clicking "Add Options", a new page will appear. Look for the option to "Create a New Custom Option" and select it. This will trigger a pop-up window to open, providing fields for inputting your custom option details.
-
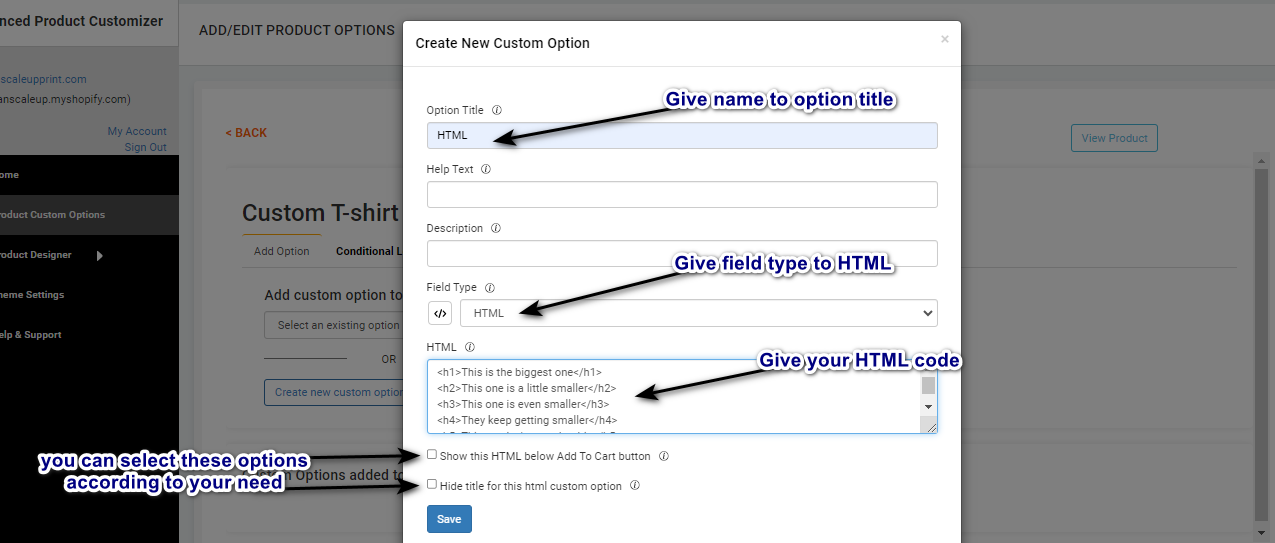
Provide Information for Custom Option
In the pop-up, fill in the necessary information. Begin by giving your custom option a descriptive name in the "Option Title" field. Then, set the field name as "HTML" to enable the HTML input block. Now, input your HTML code into the provided block. Additionally, fill out any other required fields according to your custom option needs.
-
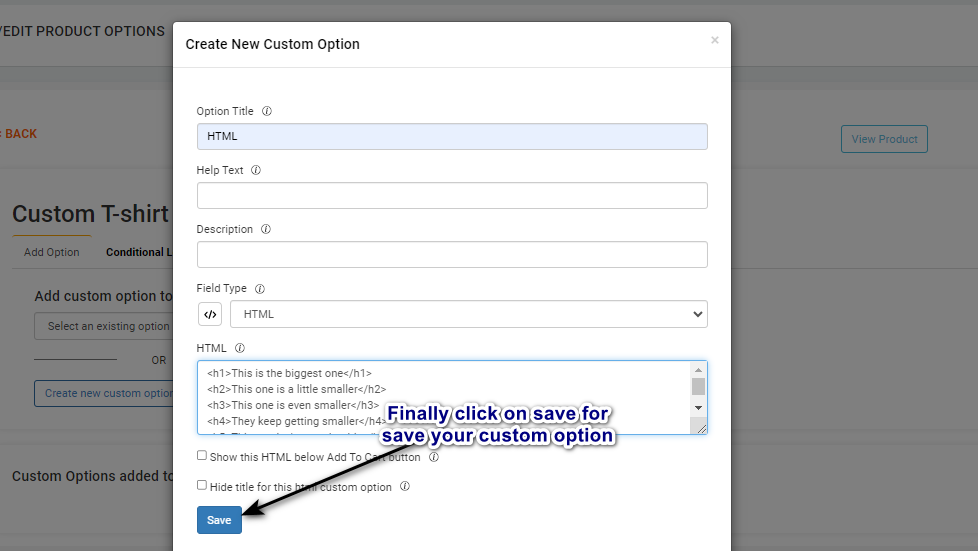
Save the Custom Option
Finally, click on the "Save" button to ensure your custom HTML option is saved.
-
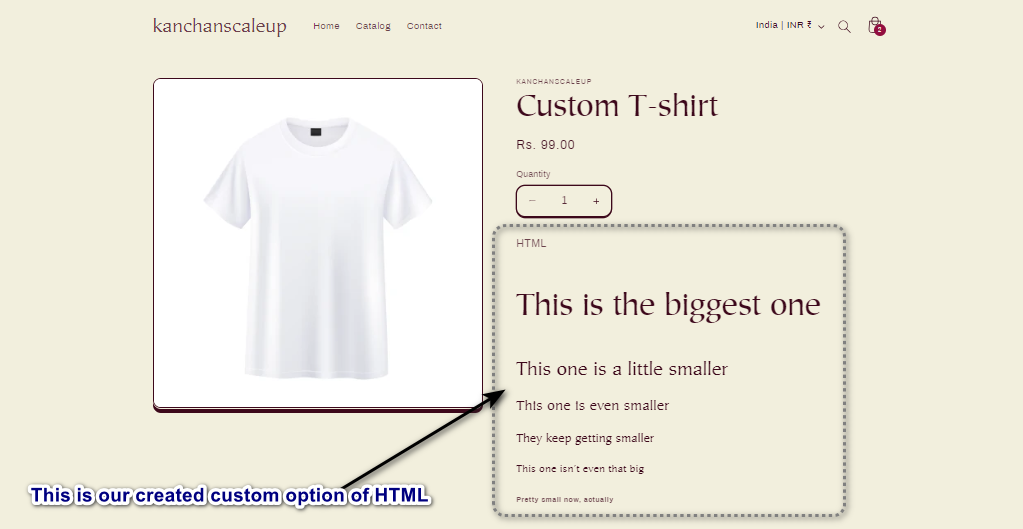
Review and Preview
After saving, you'll see the newly added custom option. To verify its functionality, locate the option for previewing in the upper right corner. Click on "View Product Option" to confirm that your custom HTML option is working as expected.

-
By following these steps, you can successfully add an HTML custom option to your product's custom options.
Here's a structured guide on how to add an HTML custom option in product custom options: