How to Apply Custom Option Template on your selected Shopify product
Here's a step-by-step guide for creating templates of custom options for a selected shopify product in ScalePrint Designer & Variants:
-
Access Templates
Log in to your Shopify admin account.
Navigate to "Templates" under the "Product Custom Option" section.
Then click on "Create new template option".
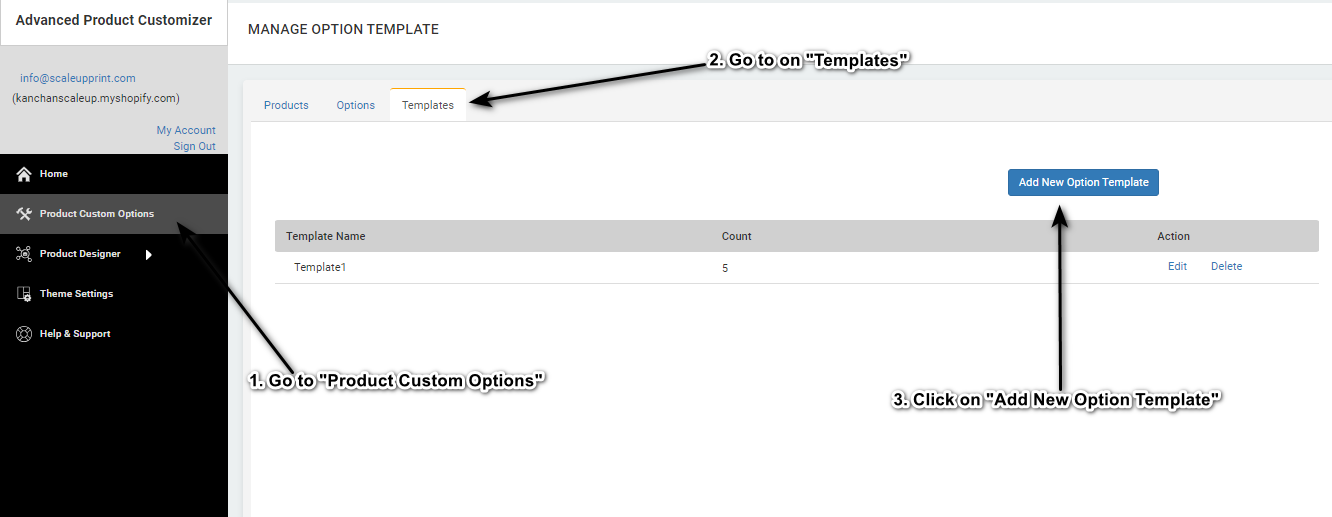
-
Create New Template Option
A pop-up window will appear. Enter a title for your template, for example, "Template2".
From the dropdown menu, select the custom options you want to add to your template.
Click on the "Select" button next to each option to add them to your template.
Continue adding as many custom options as needed for your template.
Then click on "save" button.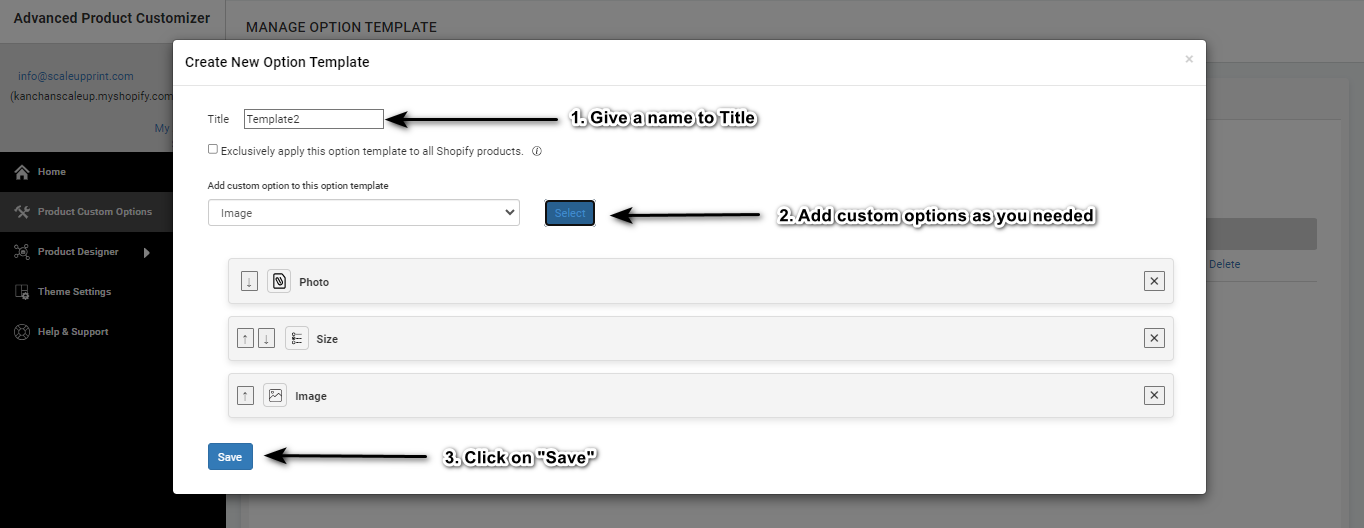
-
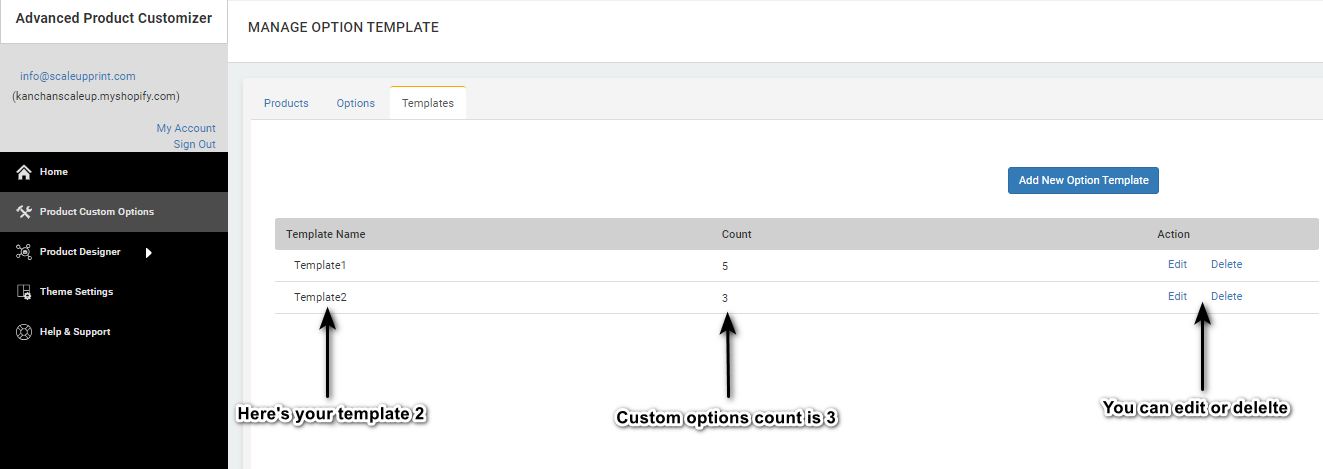
Check Created Template
After saving, you'll see your created template listed.
And it's displaying the total count of custom options added in template.
You'll also have options to edit or delete the template if needed.
-
Select A Product
Go to Products then select a product on which you want to apply this template.
Here I selected custom t-shirt, then click on "Add Options"
This will open a new page where you can see an "add options"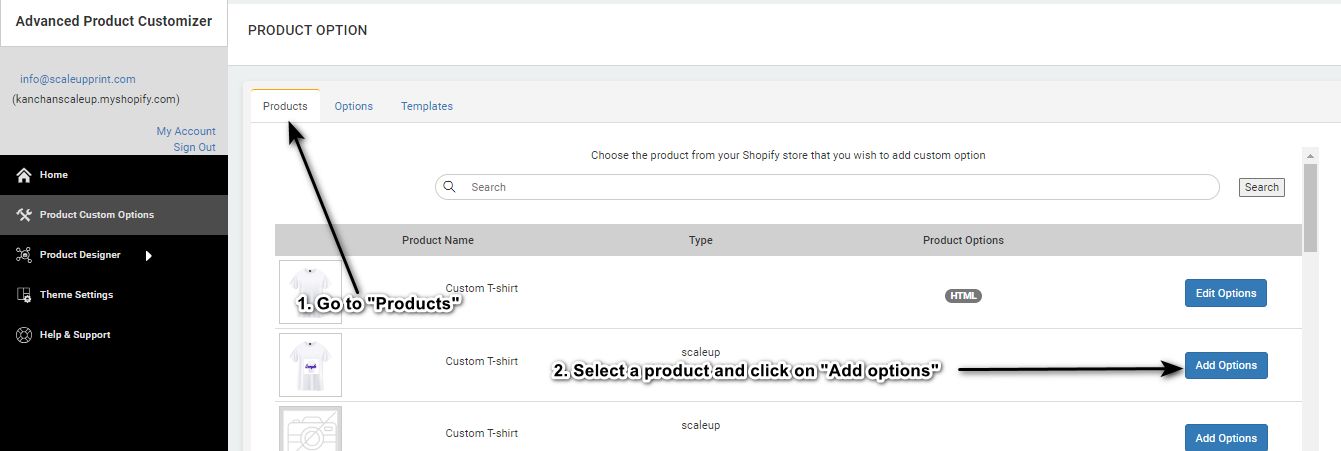
-
Add Template to Product
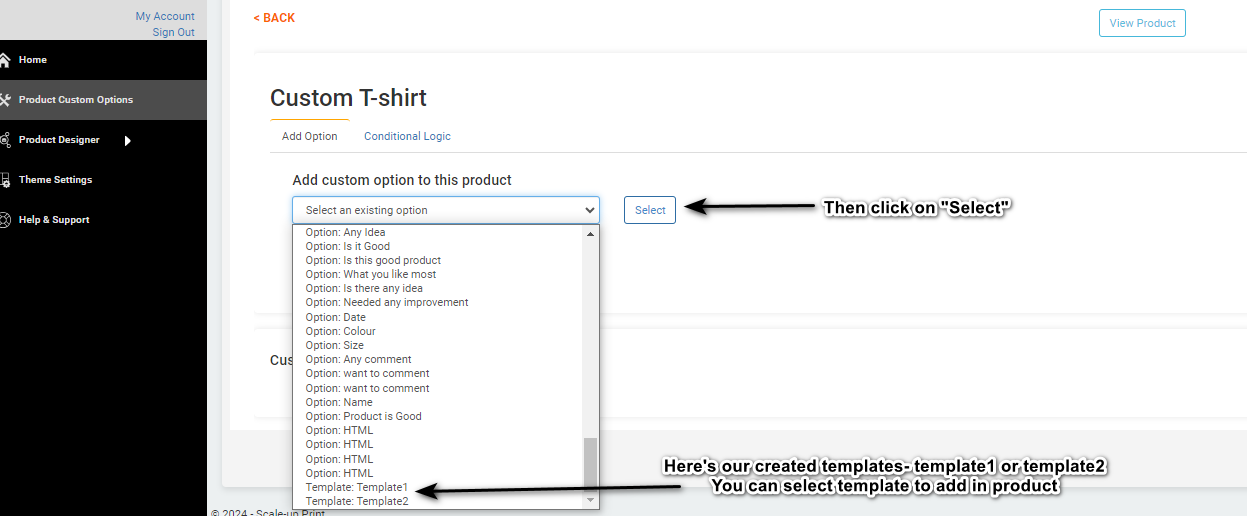
Here select your created template from dropdown in Select an existing product.
Then click on "Select" button it will added the template in product.
-
Check Template
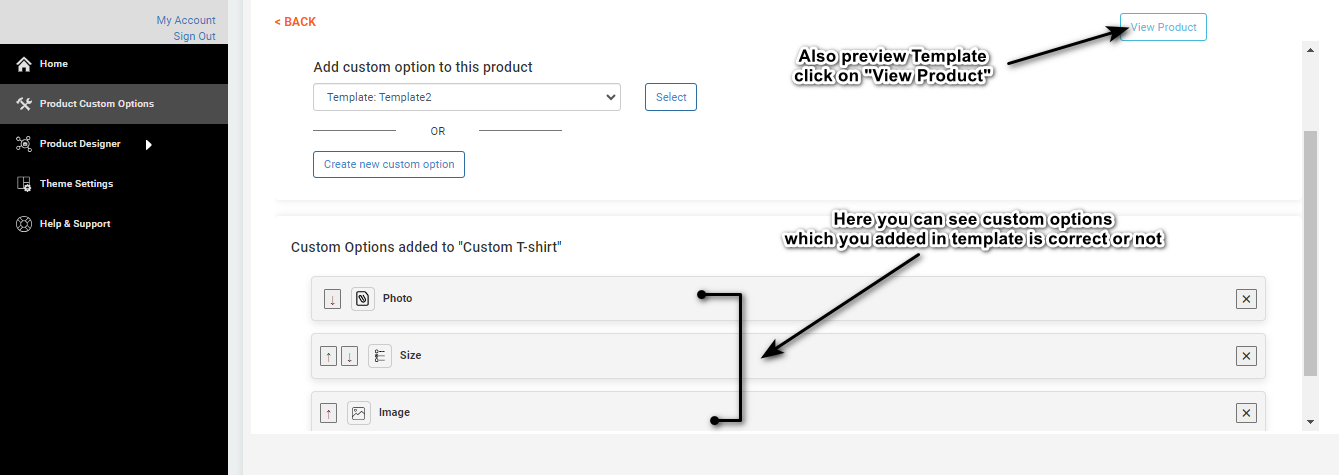
After adding this in below you can see custom options which you added in template are correct or not
And also can check your template by clicking on "View Product" in right upper side.
-
Preview On Product
After clicking on View Product it will redirect you to the product where you can check your template is added successfully or not.
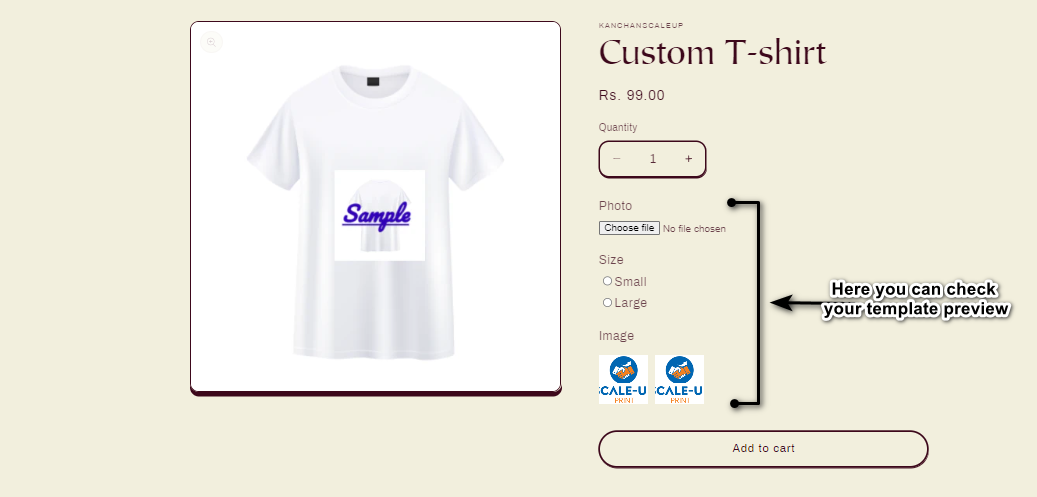
Congratulations! You have successfully created a template on a specified Product by ScalePrint Designer & Variants.
