How to Set Clip Art in Products
Follow these steps to add and configure clip art options for products within your product designer or admin panel:
-
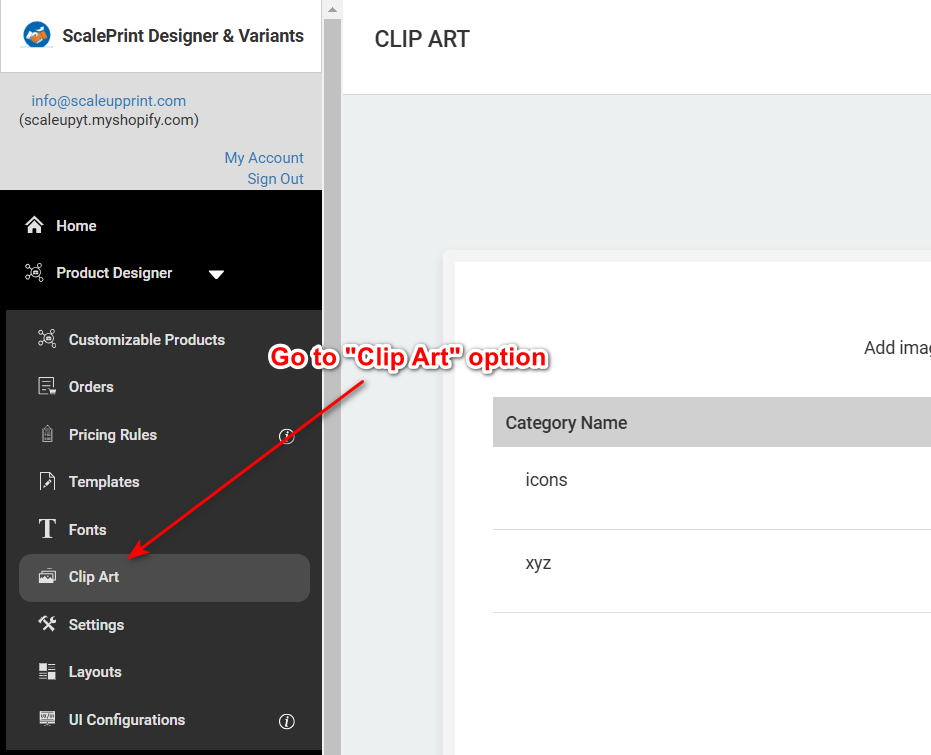
Navigate to Clip Art
Start by logging into the product designer or admin panel. In the main dashboard, locate the "Clip Art" option in the side menu. Selecting this option will bring you to the clip art management page, where you can browse existing clip art collections or prepare to add new categories and images.
-
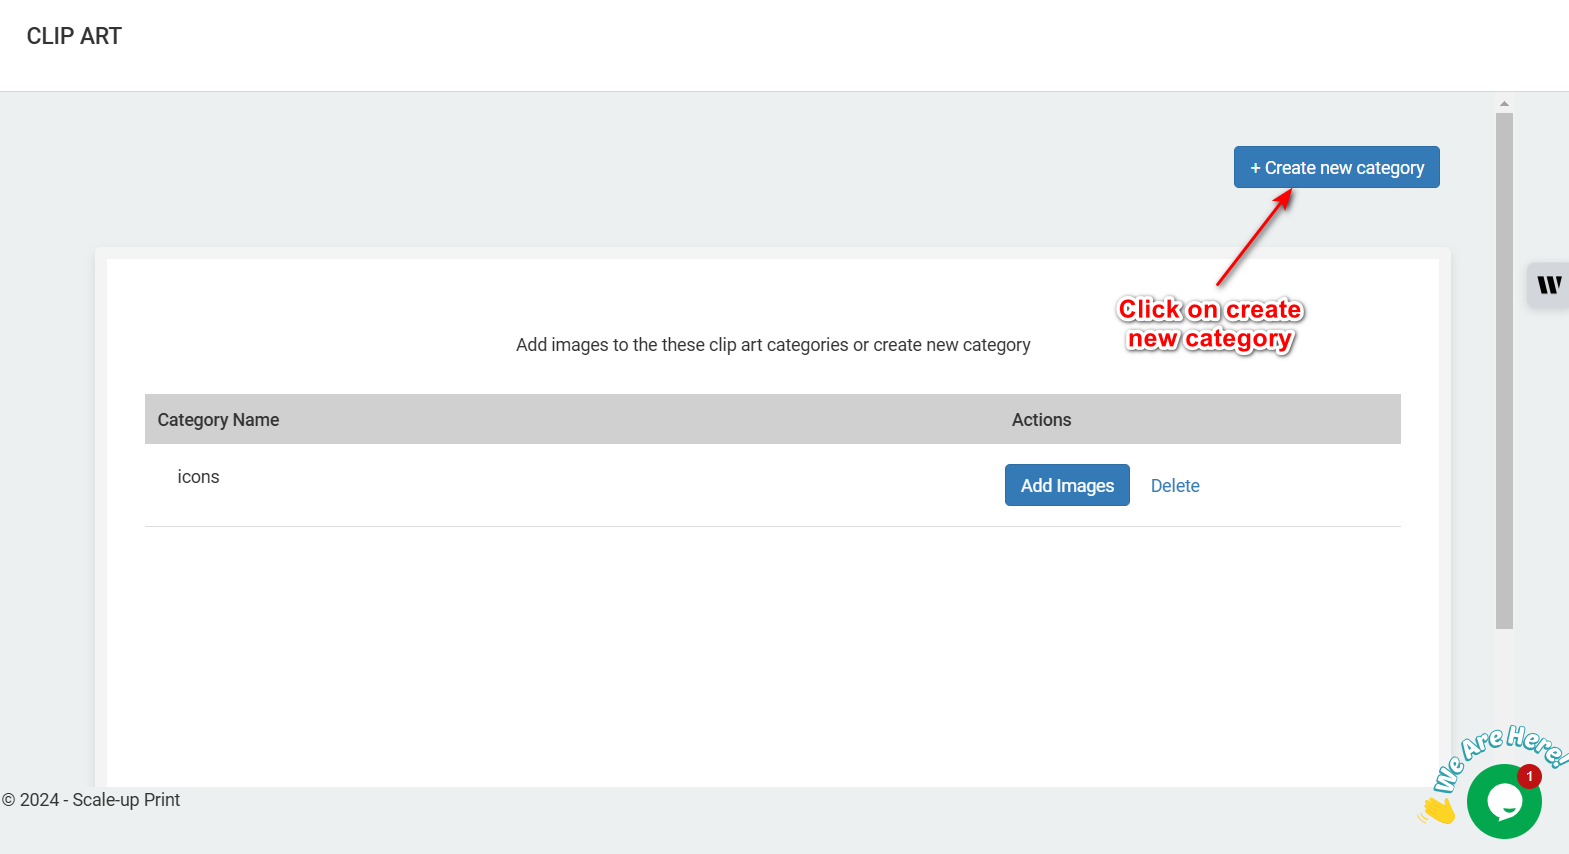
Click on Create New Category
On the clip art management page, you'll see a search bar for finding specific clip art items. To add new clip art under a specific category, click the "Create New Category" button. This option lets you set up a category to organize related clip art images for customers.
-
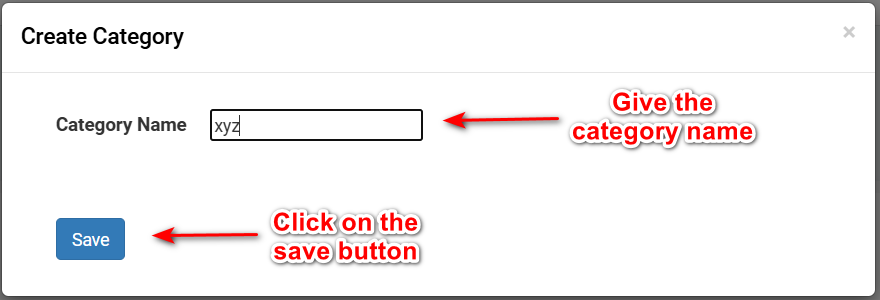
Give the Category Name
After clicking "Create New Category," you'll be prompted to enter a name for the category. Choose a name that best describes the clip art theme or style (e.g., "Nature," "Icons," or "Holiday"). This category name will help customers easily find and select from various clip art options.
-
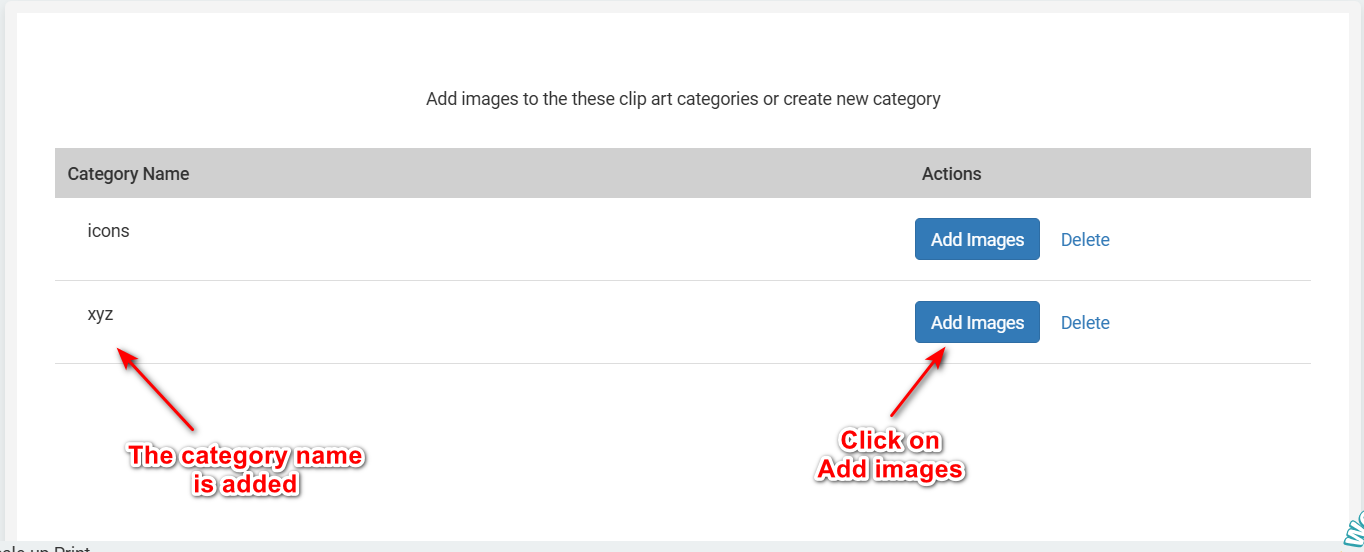
Check the Category and Click on Add Image
After creating the category, return to the main clip art management page and locate the new category. Once it appears, click on the category to view its contents. Then, to add clip art images to this category, click on the "Add Image" button.
-
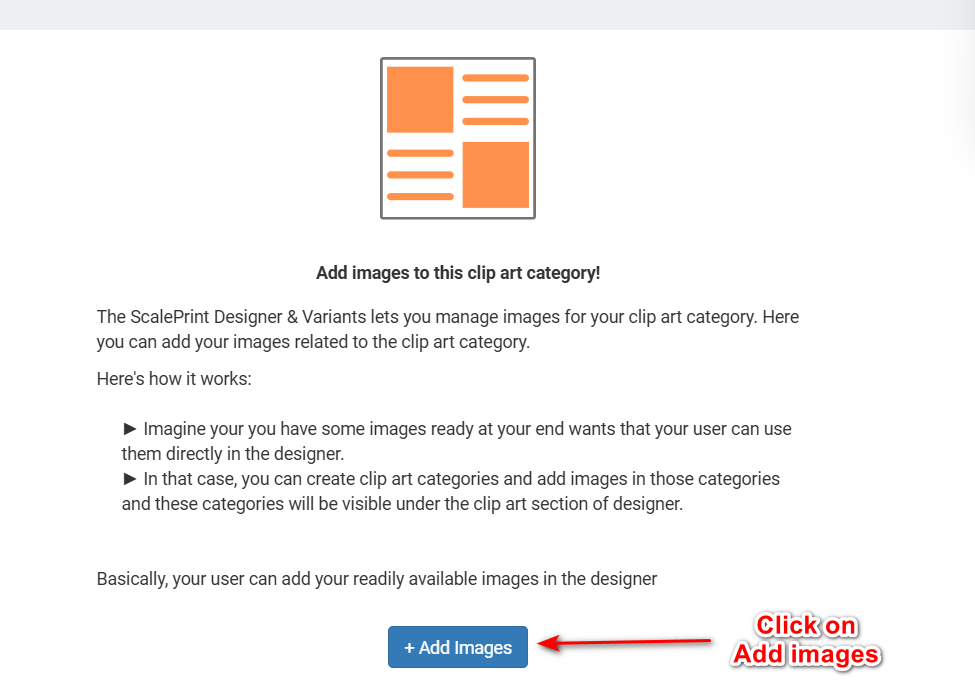
Click on Add Image
With the category selected, click the "Add Image" button to begin uploading a new clip art image. This action will allow you to upload files from your computer and add them to the chosen category for customer access in the designer tool.
-
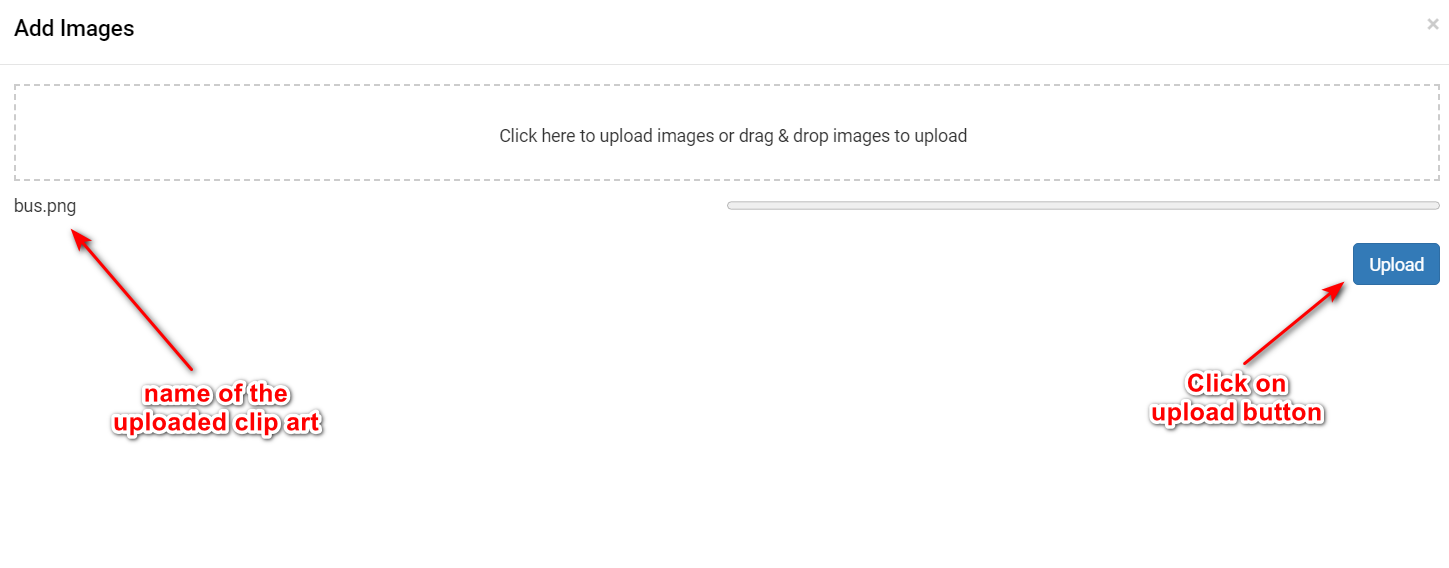
Upload the Image
After clicking "Add Image," you'll be prompted to upload a clip art file from your computer, typically in formats like .png or .svg. Once you upload the file, you can configure its details, such as adding tags or specifying how it should display in the designer tool.
-
Check the Uploaded Image or Remove the Image
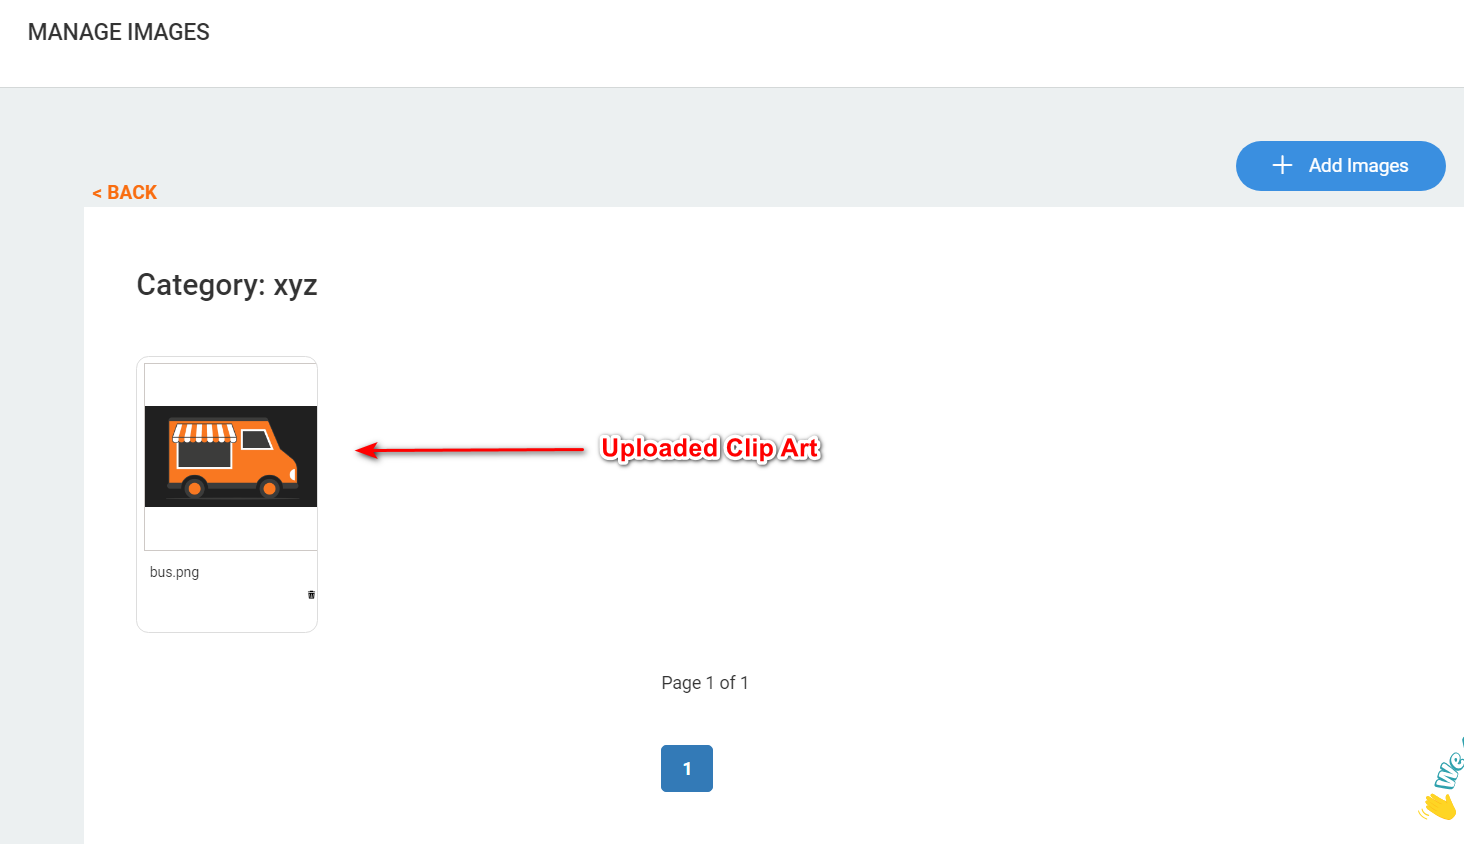
Once uploaded, verify that the image appears correctly in the category. You'll also have options to edit the image details or remove it if necessary. Checking each image after upload ensures that it is accessible to customers and displays as intended.
