How to Set Custom Font in Products
Here's a simple breakdown of the process for adding custom fonts in the product designer within the ScalePrint Designer & Variants admin panel and your Shopify store:
-
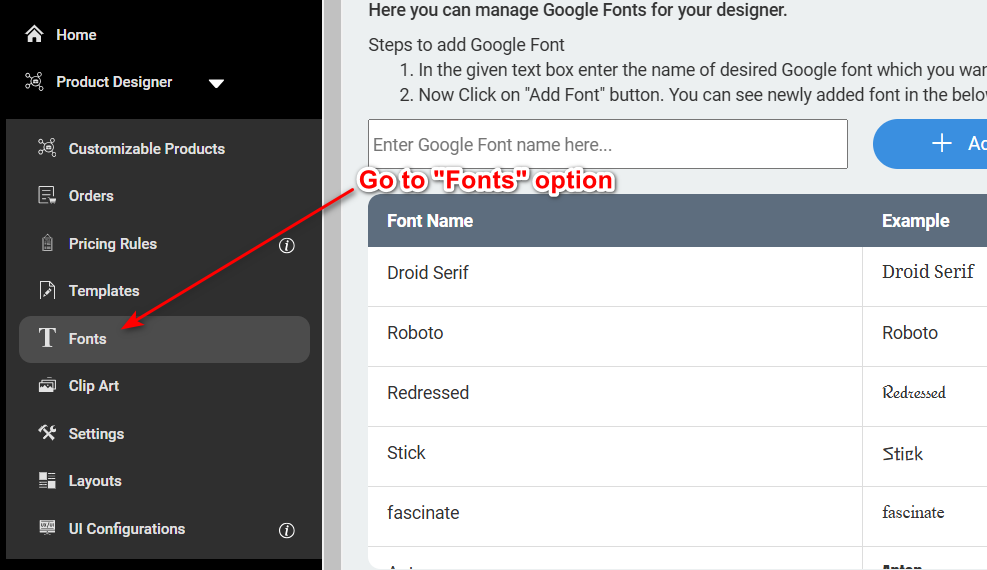
Navigate to Fonts
Begin by logging into the product designer or admin panel. From the main dashboard, find and select the "Fonts" option in the side menu. This will take you to the fonts management page, where you can view existing fonts and add new ones.

-
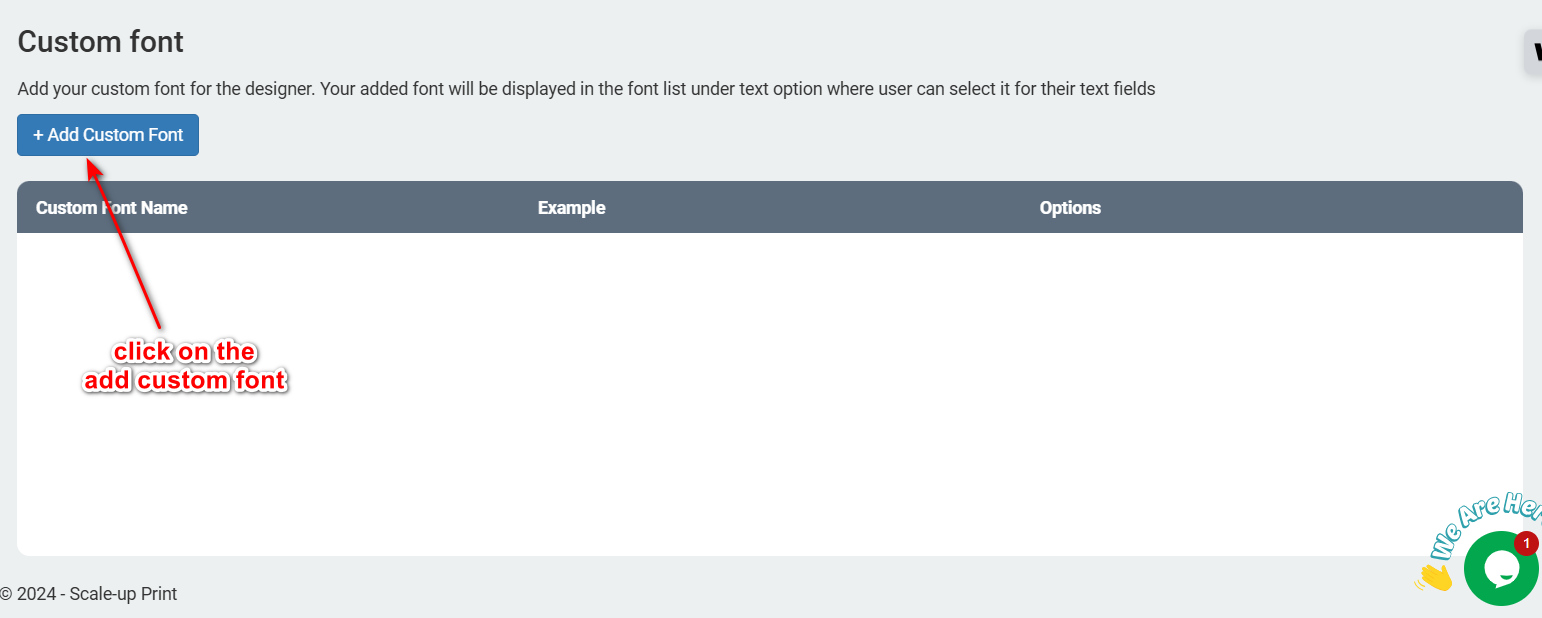
Click on Add Custom Font
Once on the fonts management page, you'll see a search bar that allows you to find fonts that are already available. To add a new font that isn't already listed, click on the "Add Font" button. This option lets you upload custom font files that you want to make available for customers.

-
Upload and Configure the Custom Font
After selecting "Add Font," you'll be prompted to upload a font file from your computer (typically in formats like .ttf or .otf). Once uploaded, configure the font by setting its name, style (e.g., bold, italic), and any other relevant options. This will make the font available in your designer tool for customers to use.

-
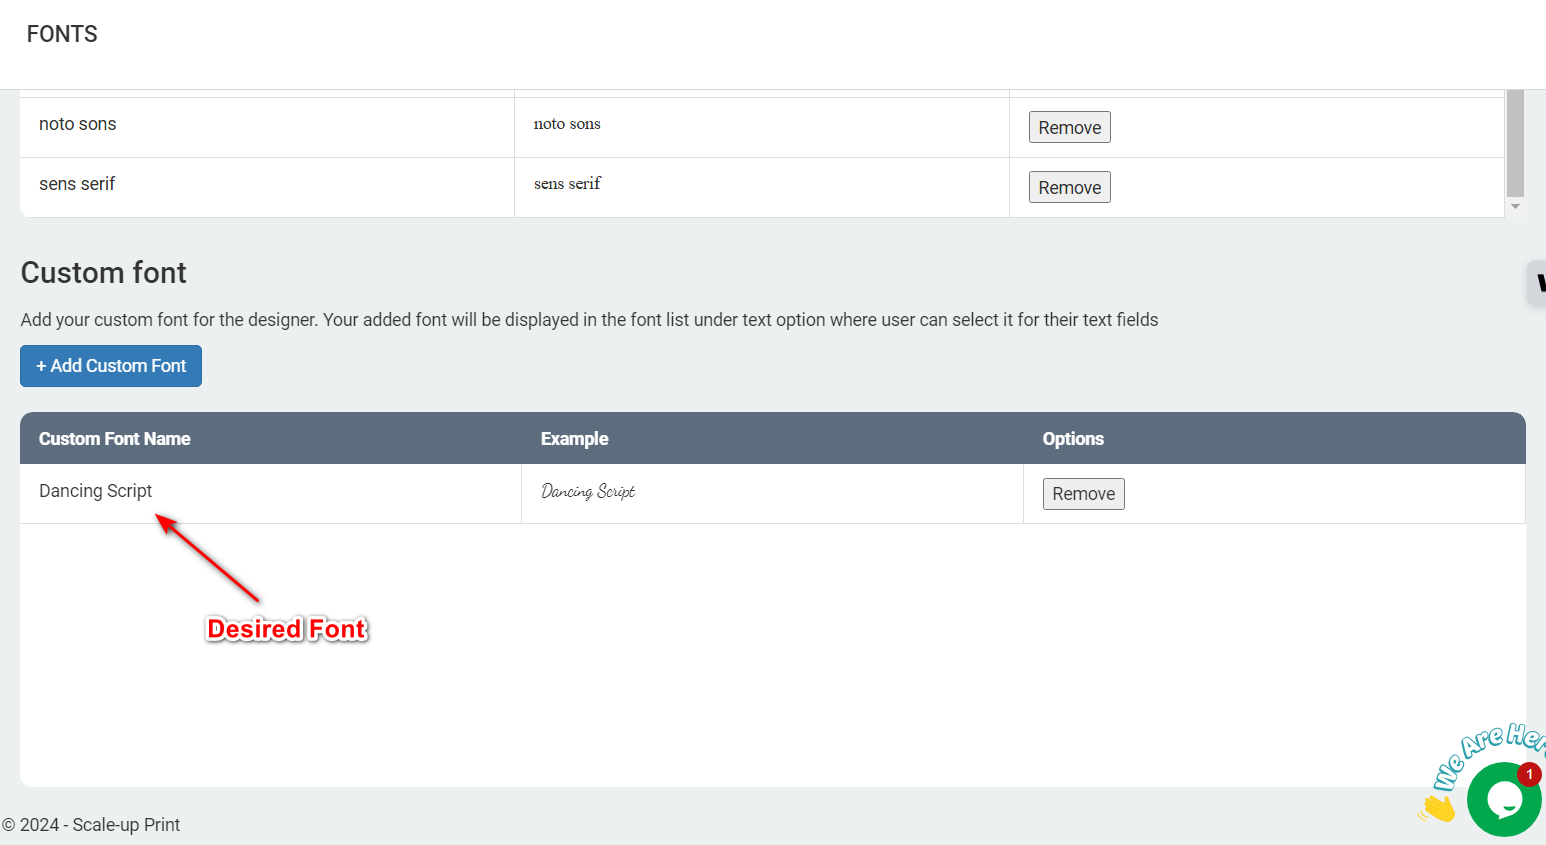
Check the Custom Font Availability
To ensure the font was successfully added, return to the fonts management page. You should see the custom font listed with options to edit or remove it if needed. To verify it's working in the product designer, you can test it on a sample product to see how it appears to customers.

-
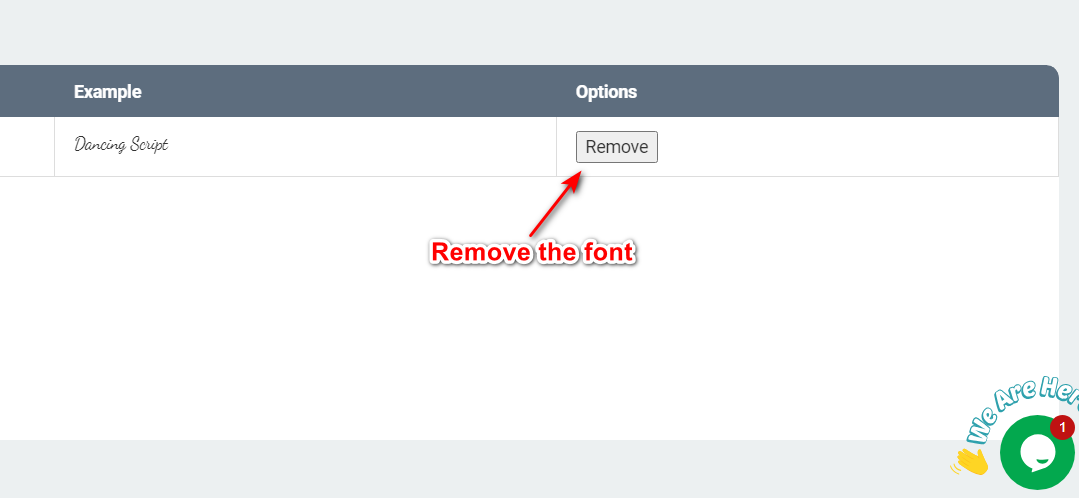
Remove or Edit Custom Fonts
If you need to remove or make adjustments to a font, locate it in the fonts list. Next to each font, you'll find options to either edit its settings or remove it completely from the library. Removing a font will prevent it from being available to customers.

