How to Set Variants in Products
Here's a step-by-step guide for setting variant in products in ScalePrint Designer & Variants:
-
Step 1: Go to Customizable Products
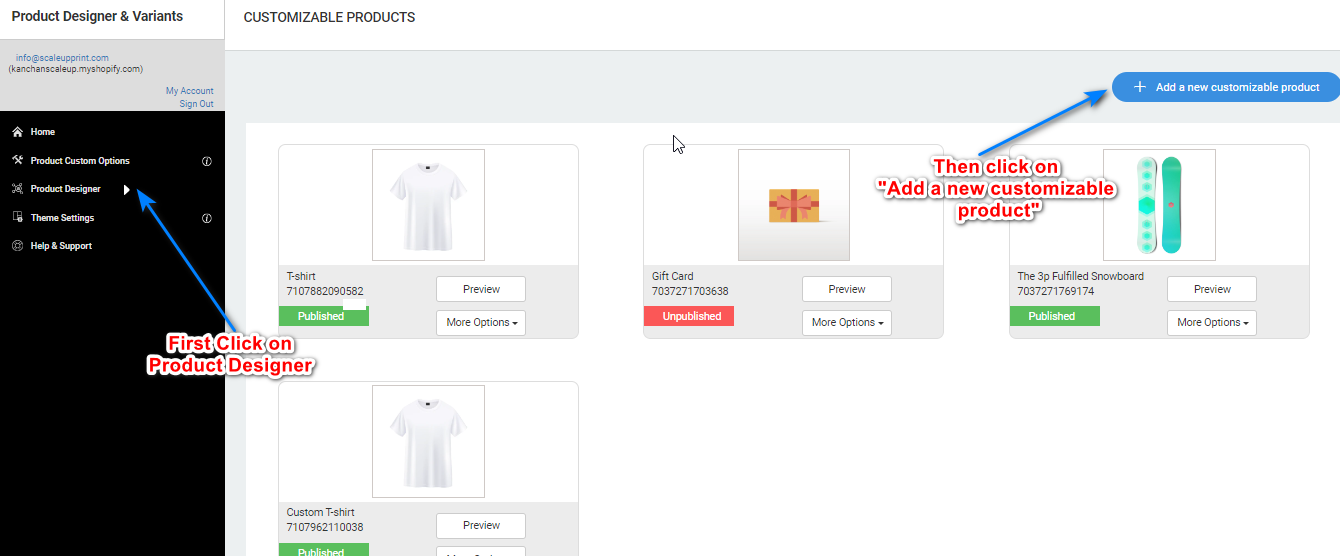
Navigate to the Product Designer in the left menu. It will redirect you to the customizable product page. Click on the "Add a new customizable product" button in the upper right corner.
-
Step 2: Select The Product
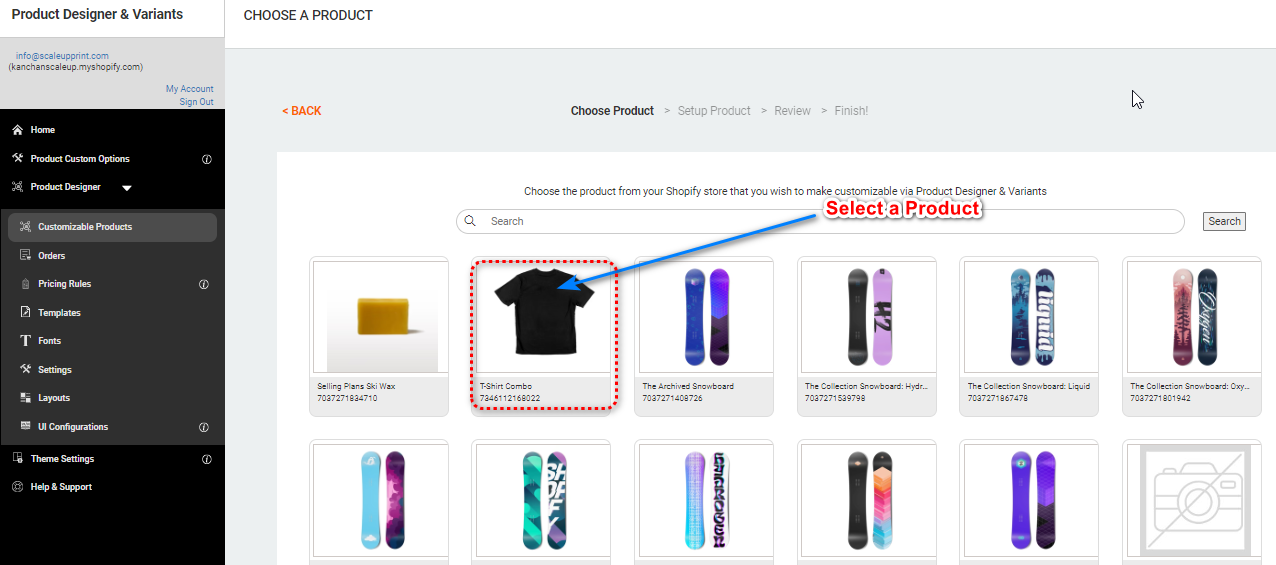
A window displaying all Shopify products in the store will open. Select the product you want to add variant to (e.g., T-shirt Combo Product with a Color variant).
-
Step 3: Set Design Area
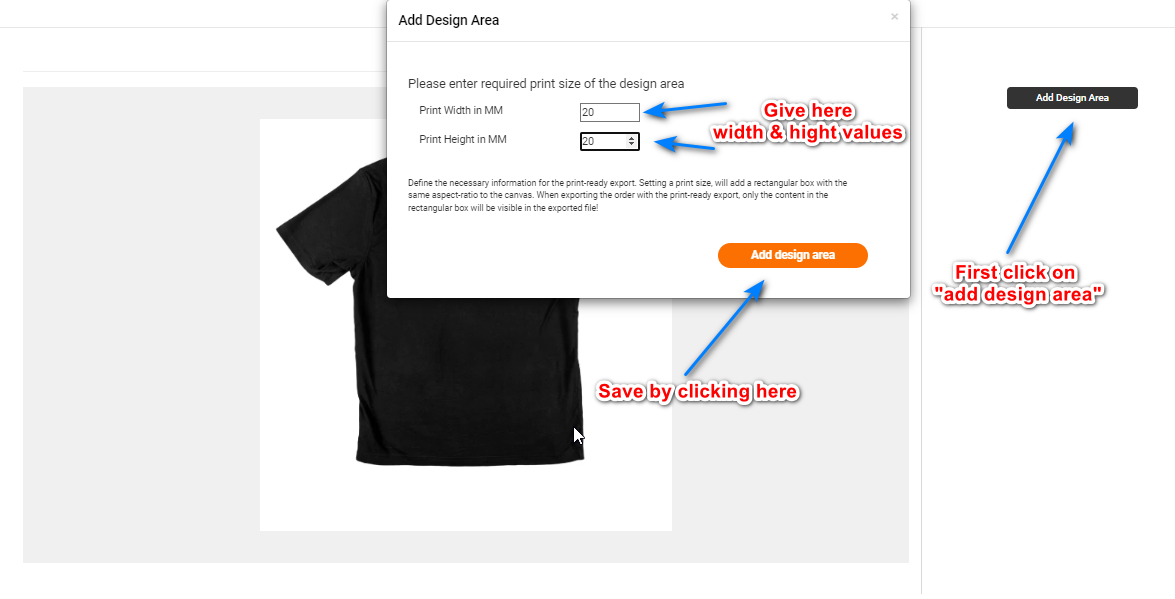
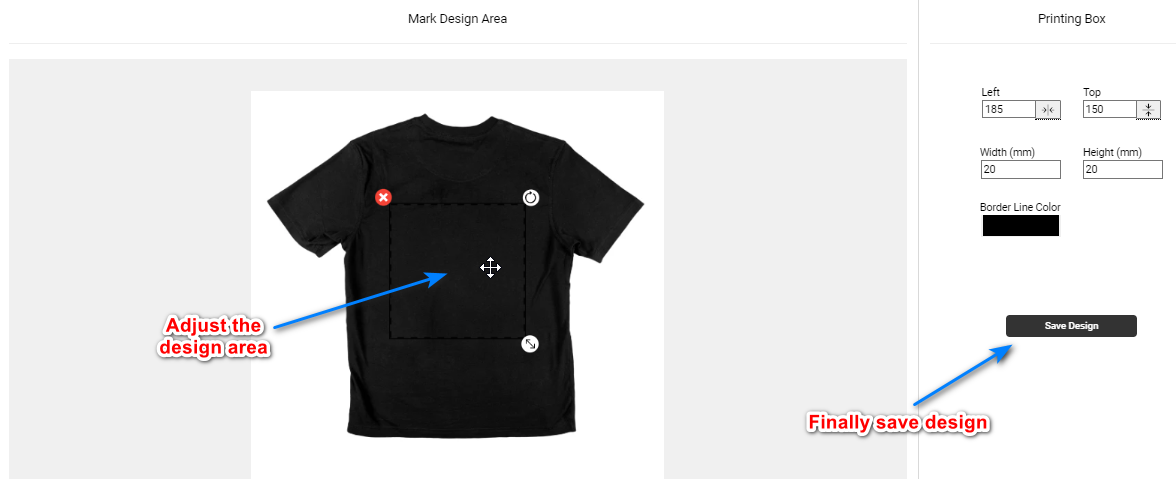
After selecting a product, you will be redirected to the Set Design Area. Click on "Set Design Area", provide the width and height, then click "Add Design Area". Adjust the design area and save it by clicking the "Save Design" button.
-
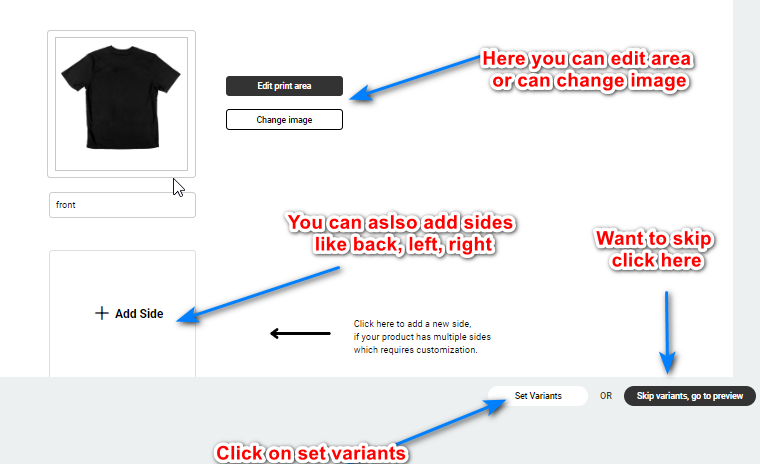
Step 4: Set Variants
Select "Set Variants" to add the variant for your product.
-
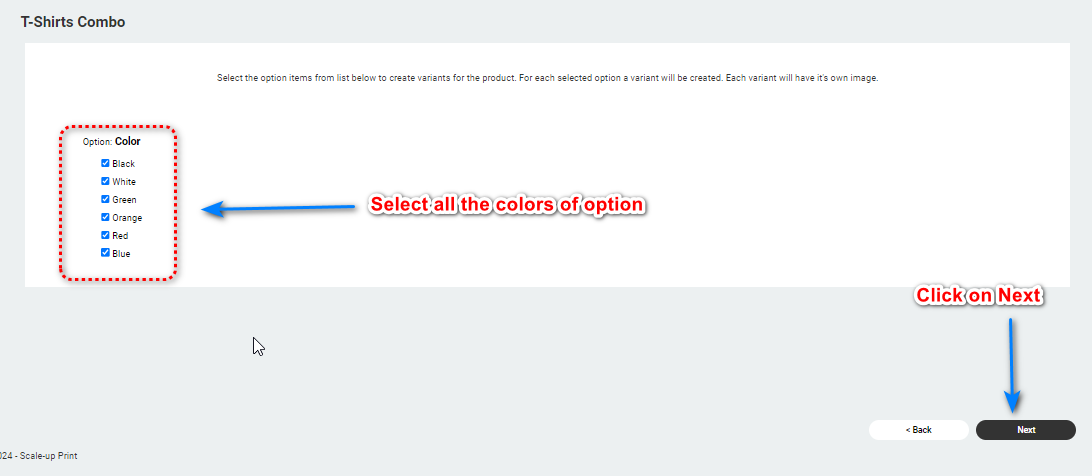
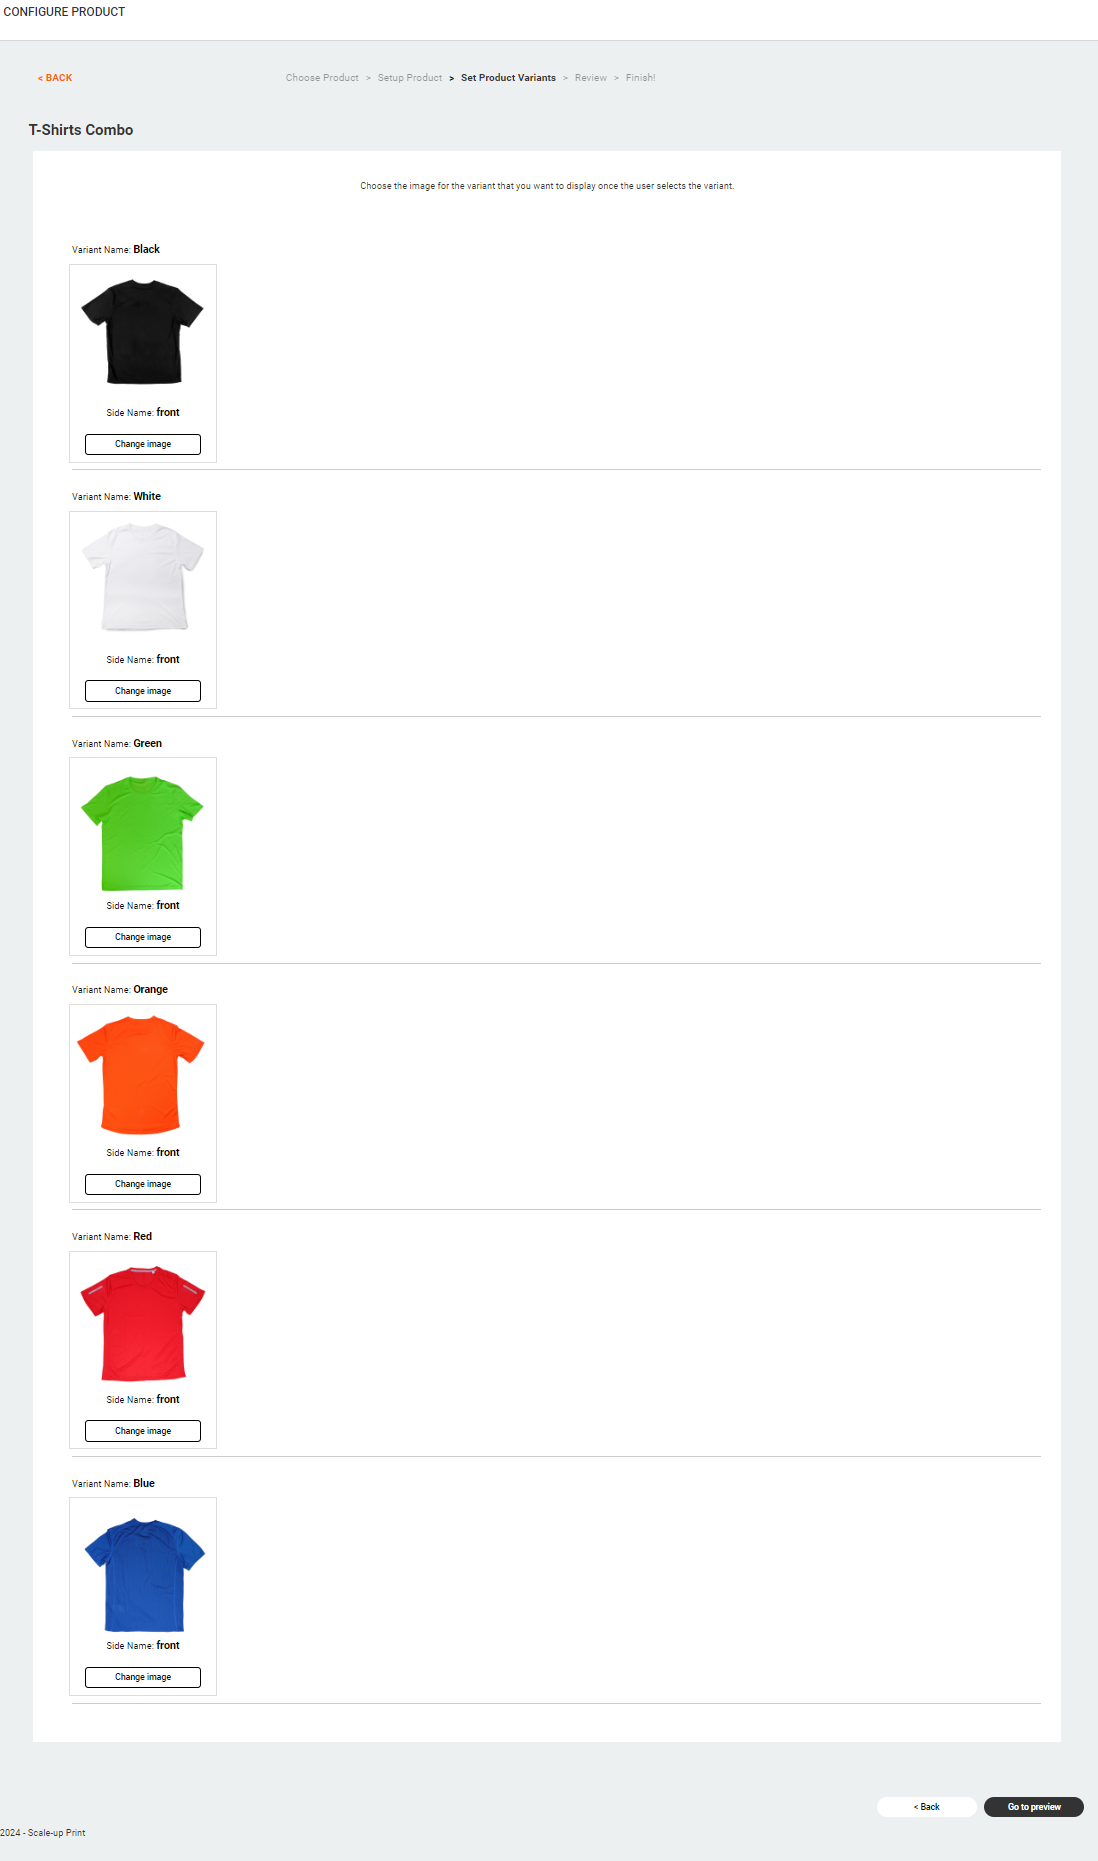
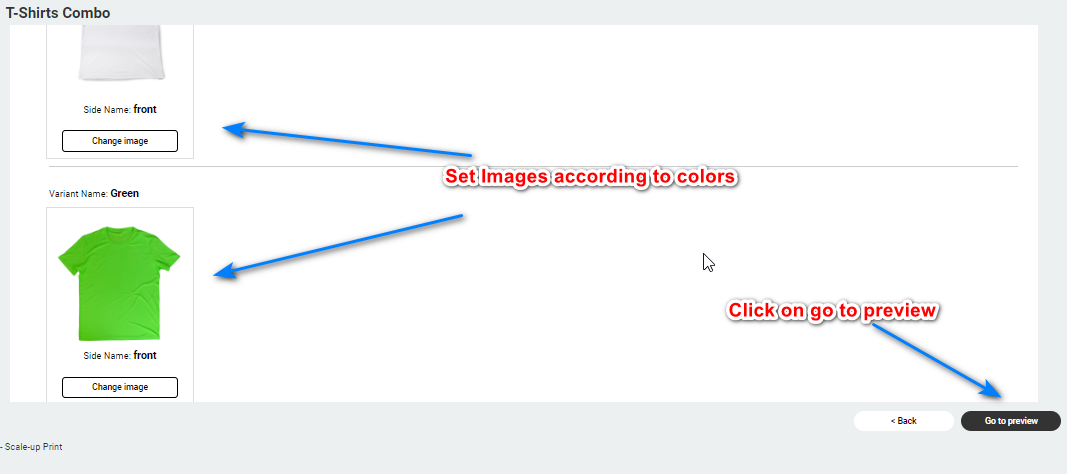
Step 5: Select Variants
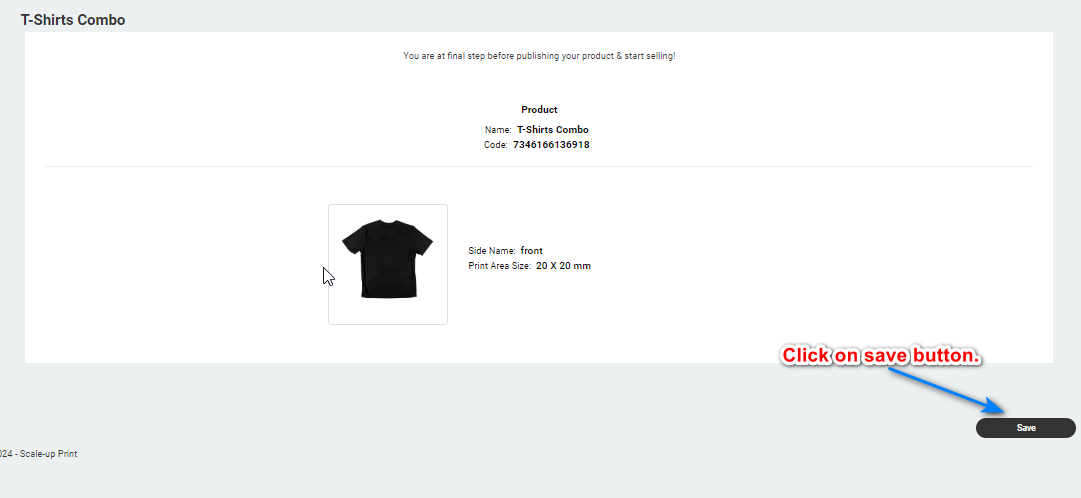
After clicking on "Set Variants", a window will display the variant added in Shopify. Select all the colors or other variant and click the "Next" button. Add images according to the variant and click "Go to Preview". Then click on "Save" to save all changes.
-
Step 6: Publish Product
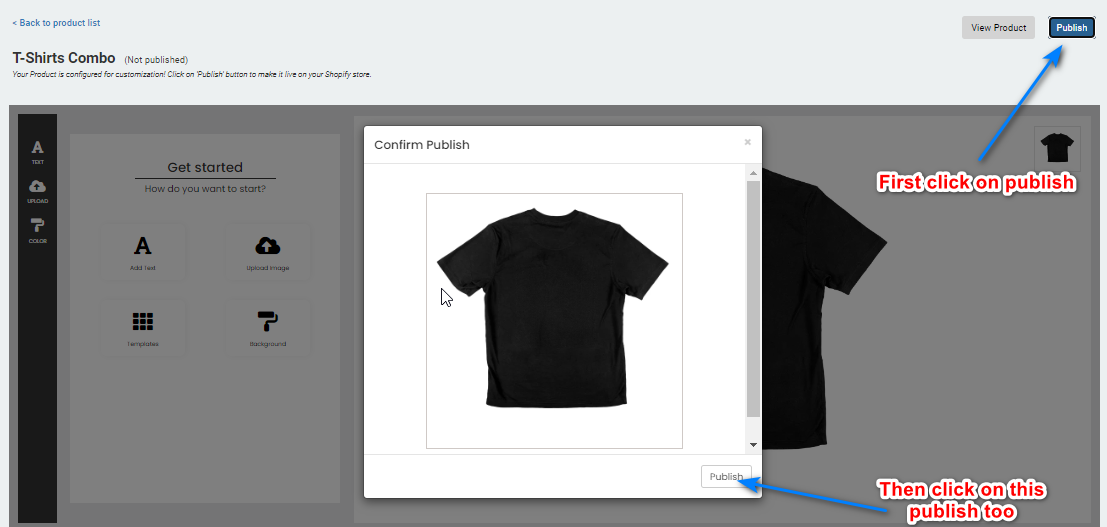
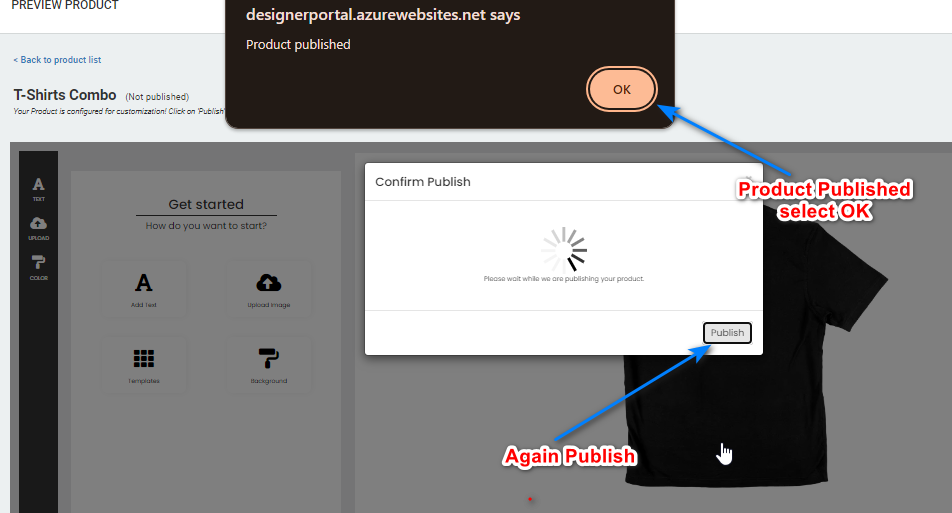
Click the "Publish" button in the upper right corner. Confirm publication by selecting "Publish" again in the popup. It will show a new popup of "Product Published", then select "OK".
-
Step 7: Customization
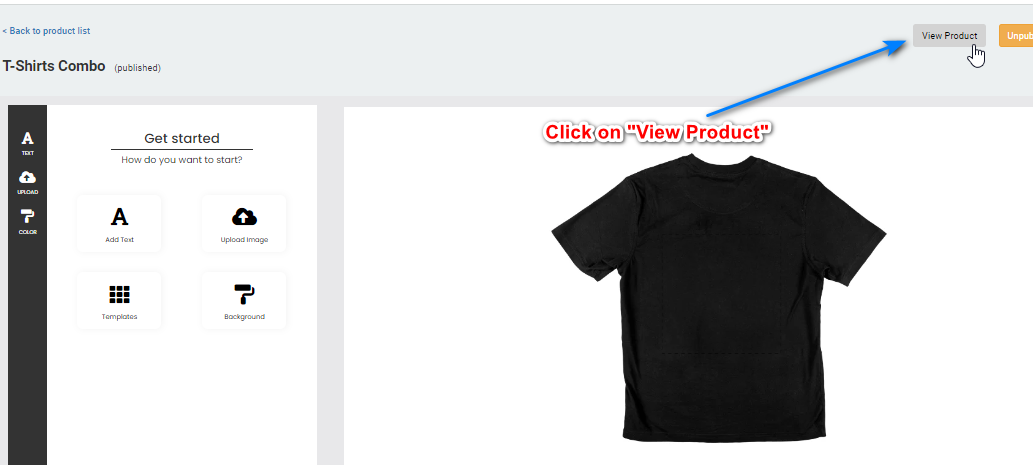
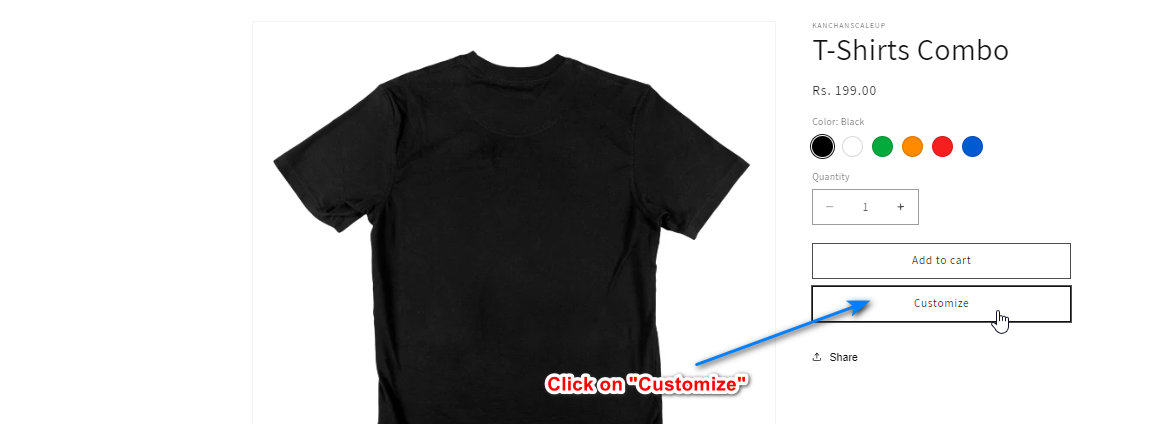
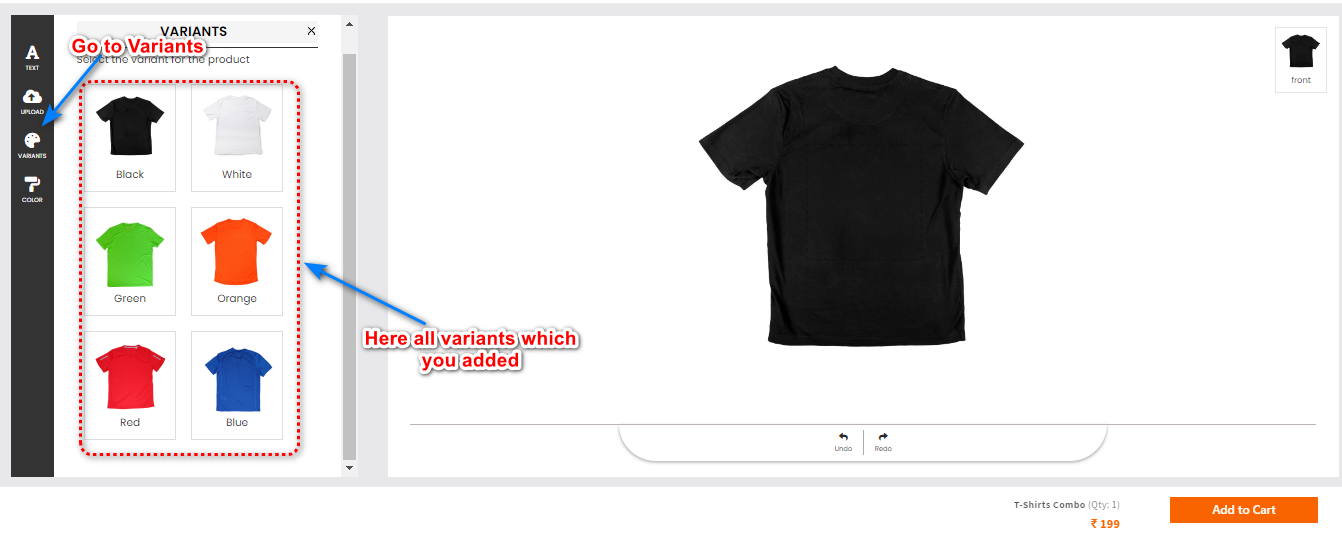
Click on the "View Product" button to view the product. Click on the "Customize" button. In the customization view, click on "Variants" from the left menu options. Check each variant by clicking on them one by one.
-
Step 8: Add to Cart
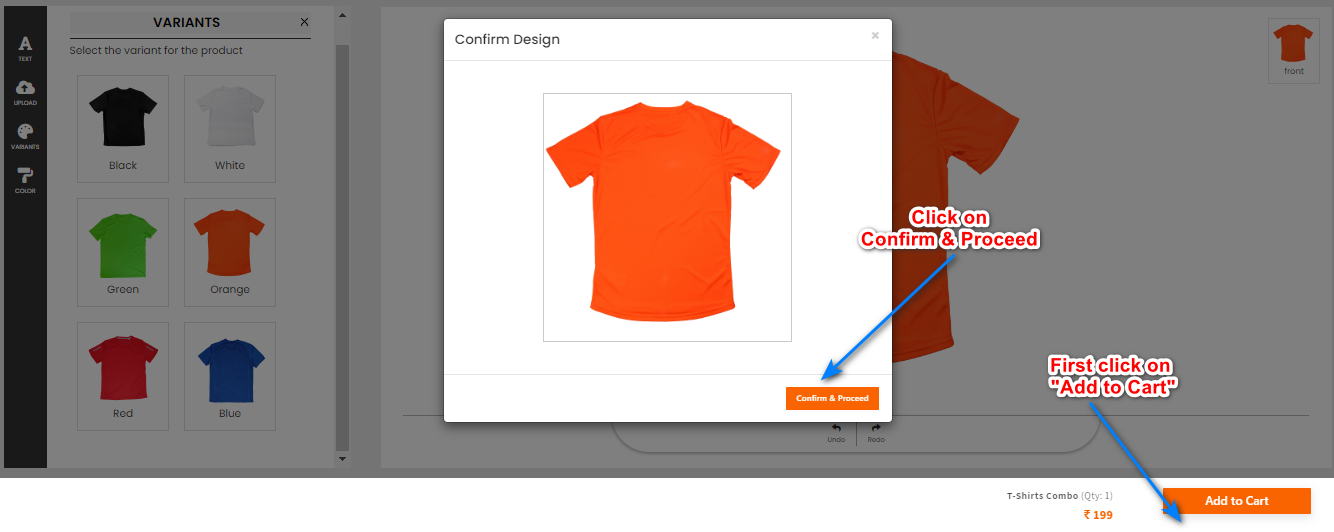
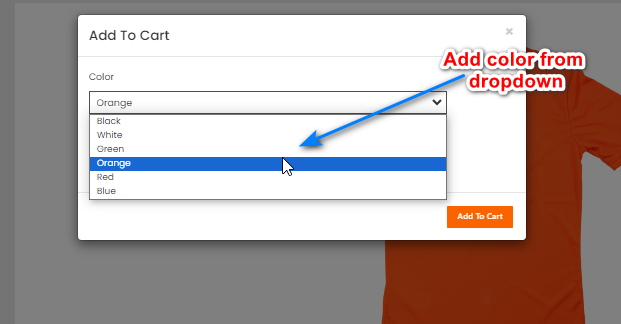
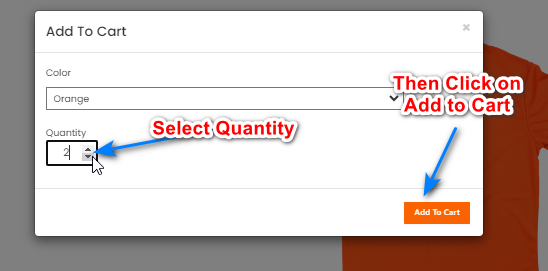
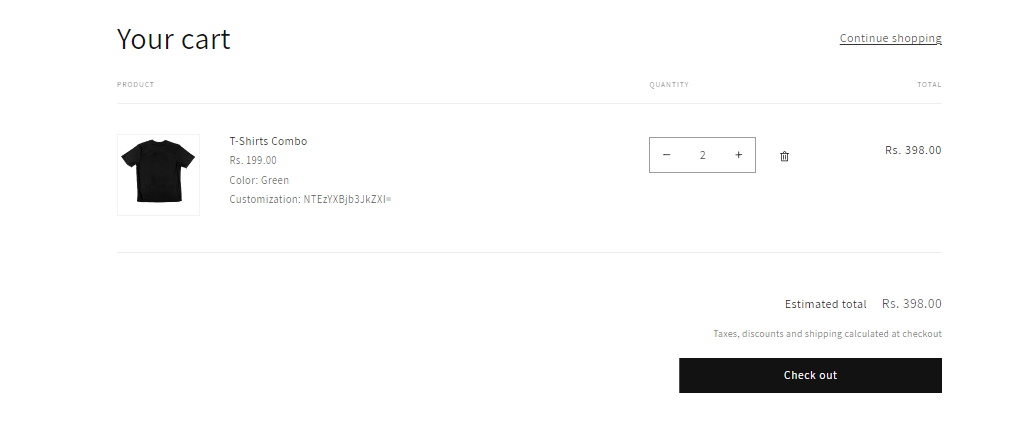
Click on the "Add to Cart" button. Confirm and proceed by selecting your color and quantity (e.g., orange color, quantity 2). Click on "Add to Cart" again to be redirected to the cart where you can see your selected product.
Congratulations! You have successfully set variant for your product.
